
The best default choice for most shippers is a direct thermal 4"x6" (approximately 100x150mm) roll that matches your printer’s width and core size. Before you order anything, check two things: your printer’s supported roll width and core diameter, and the exact paper size your shipping portal outputs. Get those two details right and the rest of the setup falls into place.
TL;DR:
- Confirm your printer’s roll width and core diameter before ordering to prevent misfeeds or jams during printing.
- Check whether your shipping portal outputs labels as 4×6 inches or close metric equivalents like 101x152mm to avoid sizing issues.
- Use direct thermal labels for daily parcel printing, but switch to thermal transfer for labels requiring longer durability against heat or moisture.
- Standardize on a single label size, core, and material type to reduce setup time and printing errors in busy fulfillment environments.
- Crop and convert A4 PDFs to 4×6 format before printing to ensure proper alignment and avoid waste from manual trimming.
Table of Contents
- Quick buyer checklist: what to check before you order 4×6 shipping labels
- Label sizes, cores, roll formats and material choices
- Which printers work with 4×6 labels and a step-by-step setup checklist
- Making and using 4×6 label templates for shipping portals and branded labels
- Common printing and adhesion problems and quick fixes
- Environmental impact and availability of eco-friendly or recyclable 4×6 shipping labels
- Common quality indicators and red flags when selecting label suppliers
- Typical shipping label regulations or requirements to ensure compliance
- Aeros’s practical view on label stock and why consistent stock matters in fulfilment
- How Aeros can reduce label friction: compare-and-book and printable label support
- FAQ
- Sources
- Supplier pages and setup guides to consult for specs and templates
Quick buyer checklist: what to check before you order 4×6 shipping labels
Label listings look similar at a glance, but small spec differences cause most of the printing headaches shippers run into. Before you add a roll to your cart, run through a short checklist so the stock actually fits your printer and your workflow.
- Confirm the exact label size listed, whether it says 4"x6" or 100x150mm, since some suppliers round to 101x152mm and that small difference can cause edge cropping on tighter printer margins.
- Check the core diameter, usually 25mm (close to 1 inch), and confirm whether your printer takes face-in or face-out rolls, because the wrong orientation jams the feed path.
- Pick direct thermal for everyday parcel labels; switch to thermal transfer only when a label needs to survive months of handling, moisture or UV exposure, since direct thermal doesn’t need a ribbon and prints on demand while thermal transfer trades convenience for durability.
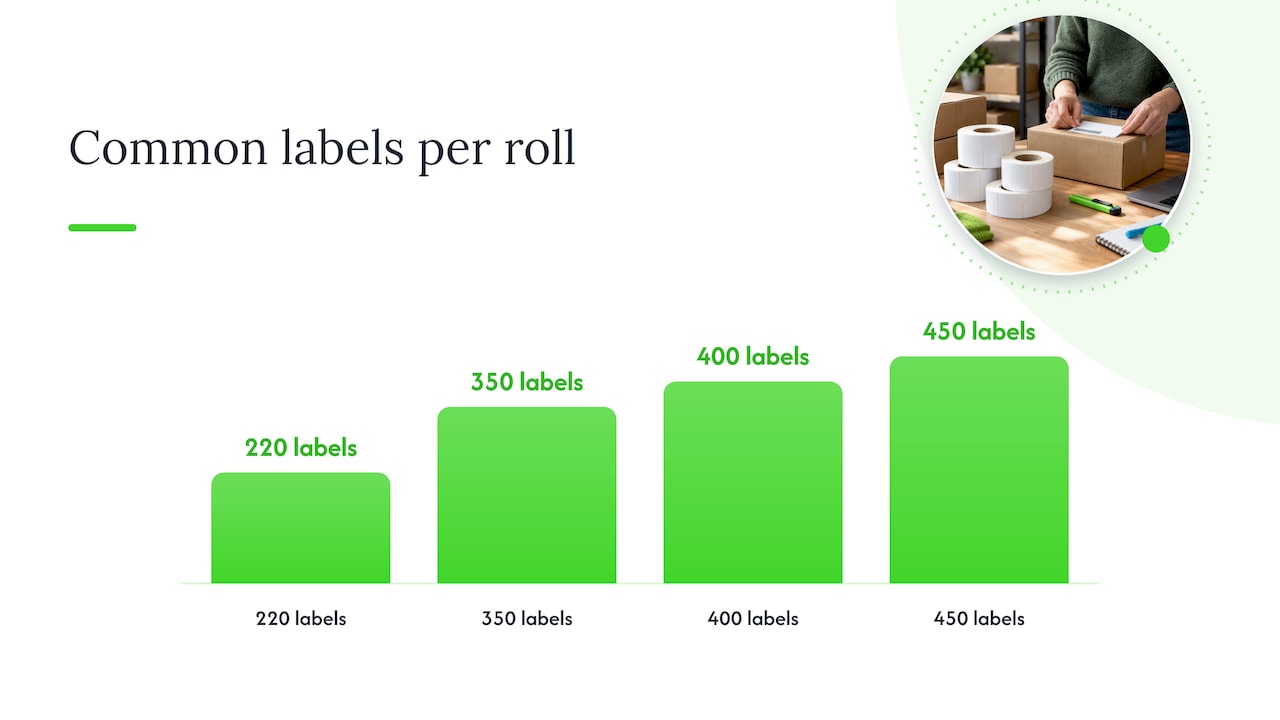
- Compare labels per roll against your typical volume. Suppliers commonly sell 220, 350, 400 and 450 label rolls, and a bigger roll means fewer spool changes but more storage space used.
- Check the adhesive type against the surface you’re sticking to: permanent adhesive for cardboard cartons, removable adhesive if the label needs to come off cleanly for returns or box reuse.
- Confirm perforation and liner type. Perforated rolls separate cleanly between labels, while continuous stock needs a printer that can cut or tear accurately, and some rolls include moisture-resistant packaging worth asking about if you store stock in a garage or warehouse.
Pro Tip: Order one small test roll before committing to a bulk pack, especially if you’re trying a new supplier or core size for the first time.
Getting these checks right before you buy saves a return shipment and a week of printing on the wrong stock.
Label sizes, cores, roll formats and material choices
Most 4×6 labels are listed by suppliers as 100x150mm, which is the metric rounding of the imperial 4×6 inch size. Some listings show 101x152mm instead, reflecting a slightly different rounding convention, so it pays to check which figure your printer driver expects before ordering stock based on the label name alone.
Core size is the next detail that trips people up. Most compact desktop thermal printers take a 25mm (roughly 1 inch) core, while larger industrial printers sometimes use bigger spindles. Measure your printer’s spindle or check the spec sheet rather than guessing, because a roll with the wrong core either won’t sit properly or will wobble and misfeed.
Roll counts vary by supplier, and the trade-off is straightforward:
- Smaller rolls (around 220 to 350 labels) suit lower-volume shippers who don’t want stock sitting unused for months.
- Larger rolls (400 to 450 or more labels, as commonly listed by suppliers for 4×6 direct thermal stock) suit businesses printing daily, trading storage space for fewer roll changes.
- Mixed-volume shippers often keep one open roll plus one spare, rather than stockpiling multiple rolls at once.
On material, direct thermal labels use a heat-sensitive coating, so there’s no ribbon to buy or replace, but the coating is sensitive to prolonged heat and direct sunlight, which can fade the print over time. Thermal transfer uses a ribbon to burn ink onto the label, giving longer-lasting print at the cost of an extra consumable and a compatible printer. Some suppliers also offer smudge-resistant topcoats, moisture-protective roll packaging, and whiteout-style cover labels designed to let you relabel and reuse boxes, features worth checking on the product page if durability or presentation matters to your shipments.
Which printers work with 4×6 labels and a step-by-step setup checklist
Most 4" desktop thermal printers, including common Zebra, Dymo, Rollo and MUNBYN-style models, accept 4×6 roll stock, but compatibility depends on more than just print width. Before loading a new roll, check the maximum print width your printer supports, whether it reads gap sensors or black marks on the label liner, the core diameter it accepts, and whether it loads face-in or face-out.
A clean setup follows the same sequence every time:
- Open the label file and check its page size. A 4×6 label embedded inside an A4 or Letter PDF will print small and off-centre if sent as-is.
- Set your printer driver to actual size or 100% scale, never “fit to page” or “shrink to fit”, which distorts the proportions.
- Disable browser print scaling and headers/footers if you’re printing directly from a browser, since these add margins that shift the label on the roll.
- Print one test label first, check alignment and barcode clarity, then run a small batch of five to ten before committing to a full print run.
When a marketplace or carrier generates an A4 PDF with the label sitting in one corner, the fix is to crop or convert that PDF into a single 4×6 page before sending it to the printer, rather than trying to print the full A4 sheet and cut it by hand. Most thermal printers can only print the page they’re given, so this conversion step is non-negotiable for A4-formatted exports.
Run a calibration cycle whenever labels start feeding unevenly or the printer loses track of where one label ends and the next begins. While you’re there, check barcode quiet zones (the blank margin around the barcode) and scan a printed label with a handheld scanner to confirm readability before sending a batch out the door.
For businesses printing dozens of labels a day from multiple marketplaces, manually converting each A4 export becomes a bottleneck. Watch-folder tools that automatically detect and crop label PDFs remove that repetitive step, which matters more as order volume grows.
Pro Tip: Keep a printed reference label taped near your printer showing the correct orientation and scale setting. It saves a reprint every time someone new runs the machine.
Making and using 4×6 label templates for shipping portals and branded labels
The simplest path is exporting a label directly in 4×6 format from your shipping portal or marketplace, since a native export avoids the cropping step altogether. When that option is not available, crop the PDF down to a single 4×6 page per label rather than printing a full A4 sheet and trimming it by hand.
If you’re designing your own template, a few habits keep barcodes scannable and layouts clean:
- Keep logos small and positioned away from the barcode, since oversized graphics crowd the label and risk overlapping scan zones.
- Preserve the barcode’s quiet zone, the blank space immediately around it, and use high-contrast black barcodes on a white background rather than coloured ink or backgrounds.
- Test a single proof print before running a batch, checking that text and barcodes sit fully inside the label edges with no clipping.
- Use a free online 4×6 template as a starting point if you’re building labels from scratch, then adjust margins to match your printer’s actual print area rather than the label’s nominal size.
If your business reorders the same format repeatedly, custom-printed rolls can save setup time. When ordering pre-printed stock, specify the material (direct thermal or thermal transfer), adhesive type, bleed allowance for any branded border, and whether you need perforated separation between labels. For marketplace sellers handling FBA-style prep work, labelling requirements can get specific fast, and resources covering FNSKU labelling and FBA prep are worth checking if you’re shipping into that kind of programme.
Common printing and adhesion problems and quick fixes
Most 4×6 label problems trace back to one of five causes, and each has a fast fix.
- Labels print too small or off-centre: check the file’s page size and confirm the driver is set to actual size, not “fit to page”. Print one test label at 100% before running a batch.
- Barcodes won’t scan: check the quiet zone around the barcode and confirm it’s high-contrast black on white, not a tinted background. Rescan with a handheld scanner to confirm the fix worked.
- Prints fade or smudge over time: direct thermal print has a limited lifespan, especially in heat or sunlight. For labels that need to stay legible for months, switch to thermal transfer stock.
- Labels peel off during transit: check the adhesive rating against the surface and conditions, cold storage, damp warehouses and rough handling all stress adhesive differently, and test a sample label under similar conditions before committing to a full batch.
- Rolls jam or misfeed: confirm the core size matches your printer’s spindle, check the roll is loaded in the correct face-in or face-out orientation, and run a calibration cycle if the printer keeps losing track of label boundaries.
Environmental impact and availability of eco-friendly or recyclable 4×6 shipping labels
Thermal shipping labels sit in a mixed spot environmentally. Direct thermal stock avoids ink cartridges and ribbons, which cuts down on consumable waste compared with inkjet or laser label printing. The paper backing (liner) that peels away before applying the label is typically discarded, and that liner waste adds up for high-volume shippers.
Recyclability depends on the specific adhesive and coating used, and not all thermal label stock is accepted by standard paper recycling streams because of the adhesive layer and thermal coating. Some suppliers now offer linerless labels, which remove the backing sheet entirely, or recyclable liner options, though availability varies by supplier and region. If sustainability is a priority, ask your supplier directly whether a specific product is linerless or uses a recyclable liner, rather than assuming based on general “eco” marketing language on the packaging.
For most small businesses, the more immediate lever is reducing waste through fewer reprints and misprints. A correctly sized, correctly calibrated setup means fewer wasted labels from off-centre prints or failed scans, which cuts material use more reliably than chasing a specific “green” label product.
Common quality indicators and red flags when selecting label suppliers
A handful of product page details tell you whether a 4×6 label supplier’s stock will perform well in daily use. Look for explicit mentions of smudge resistance, moisture-protective roll packaging, and clear specification of core size and labels per roll, since vague listings that skip these details often mean inconsistent stock.
Suppliers that document smudge resistance and moisture protection as product features are generally more reliable for parcels that pass through multiple handling points before delivery. Watch for red flags like listings that don’t specify whether the stock is direct thermal or thermal transfer, since loading the wrong material into a thermal transfer printer without a ribbon, or vice versa, wastes an entire roll.
Durability complaints usually trace back to one of two issues: printing on direct thermal stock that then sits in a hot vehicle or warehouse for days, or buying unbranded stock with no clear core size specification, leading to feed problems. Reviews mentioning print fading within days of printing, rather than weeks, often point to heat exposure rather than a faulty product. Checking a supplier’s return policy on thermal label rolls is a reasonable extra step if you’re ordering a new brand in bulk for the first time.
Typical shipping label regulations or requirements to ensure compliance
Carriers set their own technical requirements for label content and barcode placement, and getting these wrong is one of the most common causes of delayed or misrouted parcels. Barcode quiet zones, minimum print contrast and label placement on the parcel all affect whether a carrier’s scanning equipment reads the label correctly on the first pass.
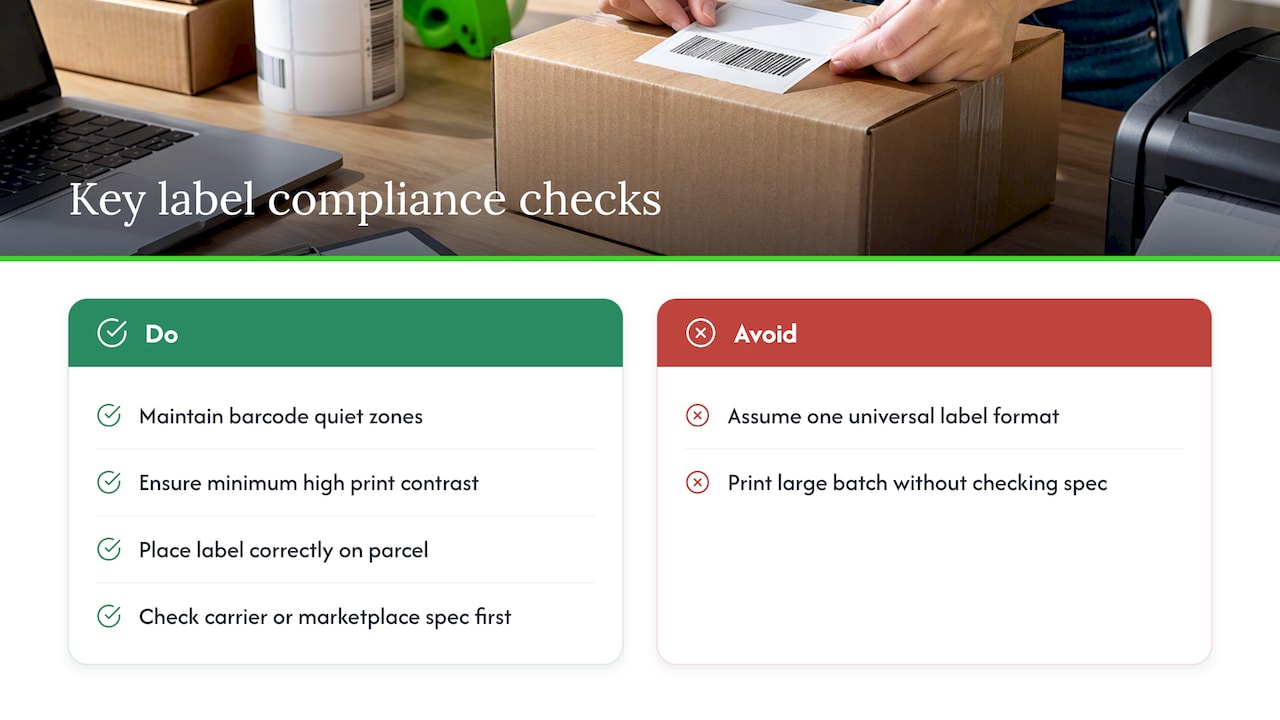
Rather than relying on a single universal standard, check the specific label specification published by the carrier you’re shipping with, since requirements for barcode size, placement and format differ between carrier networks. Maintaining clear quiet zones and high-contrast barcodes is a consistent requirement across most carrier specifications, even where other details vary.
For marketplace sellers fulfilling orders under a specific programme, such as FBA-style prep, labelling requirements can include additional rules around barcode type and placement beyond a standard shipping label. Guidance on FNSKU labelling and FBA prep is a useful reference if you’re shipping into that kind of workflow, since the requirements differ from a standard parcel label. When in doubt, check the carrier or marketplace’s own published specification page before printing a large batch, rather than assuming one label format works everywhere.
Aeros’s practical view on label stock and why consistent stock matters in fulfilment
Consistent label stock is one of the more overlooked variables in daily fulfilment. Switching between roll sizes, core diameters or materials week to week introduces small misalignments that lead to misprints, manual rework and the occasional label that a carrier can’t scan properly.
Standardising on one spec, a direct thermal 4×6 roll with a known core size and a driver preset saved once, removes a surprising amount of daily friction. Staff don’t have to re-check settings every time they load a new roll, and misprints drop because the printer is always working from the same baseline. For businesses booking through an online platform, that consistency pairs naturally with clear printable shipping label guidance, which covers the same format checks in more detail for readers setting up their own print workflow.
— Aeros
How Aeros can reduce label friction: compare-and-book and printable label support
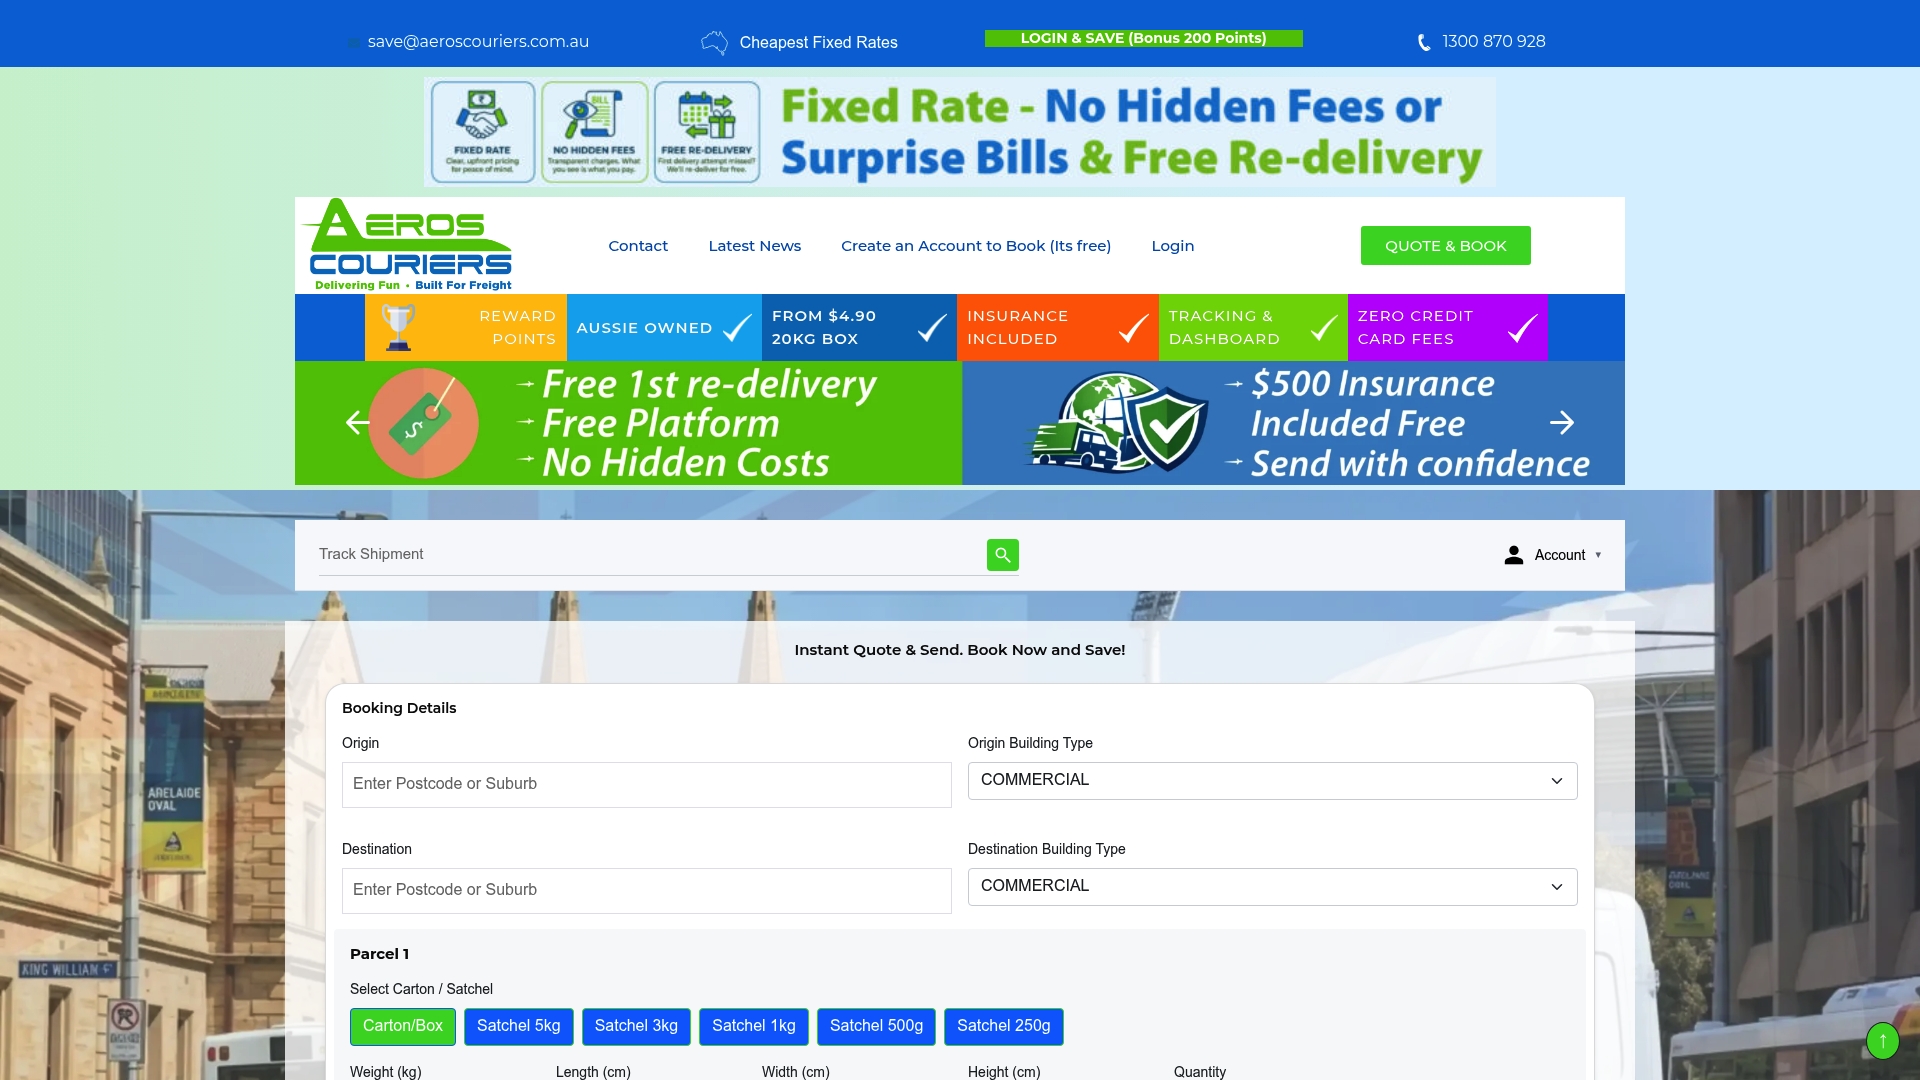
- Head to compare and book couriers to see rates side by side instead of checking each carrier separately.
- Check your shipment rate once your labels are sorted, so pricing and printing aren’t two separate headaches on shipping day.
Some courier services advertise transparent pricing with no hidden fuel surcharges or handling costs added after the fact, and rewards programmes that provide repeat shippers with ways to reduce costs further over time. Once your label workflow is sorted, check your shipment rate and book your next parcel through the platform.
FAQ
Where can I get free 4×6 shipping labels?
Free 4×6 label templates are available through online label editors, and many shipping portals and marketplaces generate a 4×6 label PDF at no cost once you’ve booked a shipment. The label stock itself (the physical rolls) is a separate purchase from a label supplier, since “free” templates only cover the design file, not the printed material.
Is 4×6 standard shipping label size?
Yes, 4×6 inch (commonly listed as 100x150mm) is the standard size used by most couriers and thermal printers for parcel shipping labels. Some supplier listings round slightly differently to 101x152mm, so it’s worth checking which figure matches your printer’s expected page size.
How to make a shipping label 4×6?
Export the label directly in 4×6 format from your shipping portal when that option exists, since it avoids any extra formatting steps. If your file comes as an A4 or Letter PDF, crop or convert it into a single 4×6 page and set your printer driver to actual size before printing.
Does Auspost print labels for free?
Label printing costs depend on the specific service and printer you’re using rather than a single fixed answer, so check the relevant carrier’s own label printing terms for the most current detail. What’s consistent across carriers is the setup: convert any A4-formatted label PDF to a 4×6 page and print at 100% scale on a compatible thermal printer.
Sources
- Set up Australia Post label printer workflows with A6, 4×6 and 100x150mm thermal settings
- 4″ x 6″ Direct Thermal Labels – 450 Per Roll – 1″ Core
- Avery® Direct Thermal Shipping Labels, 4" x 6"
Supplier pages and setup guides to consult for specs and templates
For product specs, check supplier pages like Avery’s direct thermal labels or 4×6 labels for Zebra, Dymo and other printers. For setup and templates, see the Australia Post label printer workflow guide, the free 4×6 template editor, and Aeros’s own printable shipping labels guide and compare and book couriers page.
