

")


Getting your shipping labels printed correctly is the first, and arguably most important, step to making sure your parcels get delivered on time, every time, across Australia. For any business shipping goods, the workflow is pretty straightforward: create the label in your courier’s system, print it out, and stick it on the box.
Sounds simple, right? But mastering this small task is absolutely essential for a smooth local shipping operation.
Why Getting Your Shipping Labels Right is Non-Negotiable
A shipping label isn’t just a sticker; it’s the passport for your parcel. Think of it as the single most critical piece of communication between you, your courier, and your customer. It holds all the data needed to get a package from your warehouse in Melbourne to a customer’s front door in Perth, and if it fails, the whole process grinds to a halt.
Sloppy printing or incorrect labels can lead to some serious headaches—we’re talking costly delays, returned shipments, and unhappy customers. But when you nail it, a professional, durable label not only looks good but guarantees a smooth ride through the courier network.
Getting this right from the start helps you:
- Slash Delivery Times: A crisp, clear barcode allows for automated scanning at depots. This means no manual sorting, less human error, and faster transit times.
- Cut Down on Costs: When labels are right, you avoid the sting of re-delivery fees and incorrect surcharges from couriers. It’s a simple way to protect your bottom line.
- Keep Customers Happy: Nothing builds loyalty like a fast, reliable delivery. It’s often the final touchpoint a customer has with your brand, so make it a good one.
The sheer scale of this process is massive. The Australian print label market, which includes the humble shipping label, was valued at approximately USD 1.4 billion in 2024. This number alone shows just how vital these labels are to our booming e-commerce and logistics industries.
To really get a handle on this, it’s worth starting with the fundamentals of how to print shipping labels effectively. That knowledge is the foundation for everything we’ll cover here. Throughout this guide, we’ll focus specifically on what works in Australia, helping you navigate local courier requirements for a seamless parcel delivery experience.
Choosing the Right Printer and Label Stock
The foundation of a smooth shipping operation is your hardware. Getting this right from the start will save you countless hours and prevent those frustrating, time-wasting errors down the line. For most Australian businesses, the choice really boils down to two types of printers: thermal and laser.
Each has its place, and the best one for you depends entirely on your shipping volume and how your business runs. A high-volume online store dispatching from a Sydney warehouse, for instance, will almost certainly need the raw speed of a dedicated thermal printer. On the other hand, a boutique business sending out just a few parcels a week might find their existing office laser printer is perfectly fine and a much smarter financial choice.
Thermal Printers: The E-commerce Workhorse
Thermal printers are purpose-built machines designed to do one thing exceptionally well: print labels quickly and efficiently. They use heat to create the image on the label, which means you’ll never have to think about buying ink or toner cartridges again. That’s a huge long-term cost saving right there.
You’ll typically come across two kinds of thermal technology:
- Direct Thermal: This is the go-to for shipping labels. The printer applies heat directly onto chemically treated paper, which turns black to form the text and barcodes. It’s fast, simple, and the printers themselves are often very affordable.
- Thermal Transfer: This method is a bit different. It uses a heated ribbon to melt and transfer ink onto the label. The result is a much more durable, long-lasting print that stands up well to heat, sunlight, and scuffing.
A great thermal printer is munbyn shipping label printer which can be connected via bluetooth and is cost effective and easy to use.
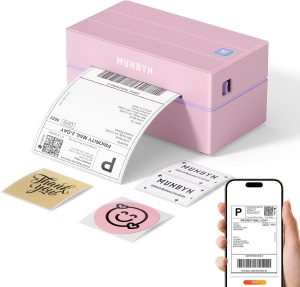
For the vast majority of e-commerce businesses, a direct thermal printer hits the sweet spot between speed and low running costs.
The real value of a thermal printer isn’t just saving money on ink; it’s the time you get back. Printing a single label in seconds versus minutes adds up to massive efficiency gains when you’re processing dozens, or even hundreds, of orders a day.
Laser Printers: A Versatile Starting Point
Almost every office already has a laser printer, making it a zero-cost entry point for new businesses just getting started. These printers use toner to create sharp, high-resolution text and barcodes on standard A4 sheets of labels.
Sure, they’re slower and involve more manual work (like peeling labels off a sheet), but they’re a completely practical option for businesses with low shipping volumes. The print quality is excellent and the labels are quite durable, though they won’t hold up to the weather like a thermal transfer print will.
Australia’s printing industry has seen some interesting shifts that mirror these technology choices. While overall printing revenue is forecast to be around AUD 7.1 billion in 2025, the real growth is in the digital printing segment—which absolutely includes on-demand shipping labels. This trend is being fuelled by e-commerce demanding fast, flexible label solutions that traditional printing just can’t provide. You can dig into more insights on how digital technology is shaping the Australian printing landscape over at IBISWorld.
Here’s a quick comparison to help you decide what’s right for your Australian business.
Thermal vs Laser Printers for Australian Shippers
| Feature | Thermal Printer (Direct/Transfer) | Laser Printer |
|---|---|---|
| Upfront Cost | Higher initial investment for the printer itself. | Low to zero if you already own one. |
| Running Costs | Very low. No ink or toner needed, only labels. | Higher. Toner and drum replacements can be expensive. |
| Printing Speed | Extremely fast, printing one label in a few seconds. | Slower, prints a full sheet at a time. |
| Ease of Use | Simple. Prints one label at a time, ready to stick. | More manual. Requires peeling labels from an A4 sheet. |
| Label Durability | Good (Direct) to Excellent (Transfer). | Good, but can smudge if it gets wet. |
| Best For | High-volume shippers (10+ parcels/day), warehouses. | Low-volume shippers, start-ups, home-based businesses. |
Ultimately, if you’re starting out, a laser printer is a great way to keep costs down. But as soon as your order volume starts to climb, investing in a thermal printer will pay for itself in time and efficiency.
Selecting the Right Label Stock
Your printer is only half the battle; the labels themselves are just as important. Using the wrong size or material can lead to rejected parcels and infuriating scanning errors at the depot.
For local Australian couriers like Australia Post, StarTrack, and CouriersPlease, the standard, universally accepted label size is 100mm x 150mm (you’ll often see it called 4×6 inch). Sticking to this format is the easiest way to ensure compatibility and readability across all the major carrier networks. Before you buy anything, make sure you understand the specific requirements of your chosen courier company.
Here’s a quick rundown of the label stock you’ll encounter:
- A4 Label Sheets: Made for laser or inkjet printers, these come with multiple labels per sheet (e.g., two or four to a page). They’re a good starting point but become really inefficient once you start shipping at scale.
- Thermal Label Rolls: These are what you feed into a thermal printer. They come in large rolls of individual, perforated labels, making them far more efficient for batch printing. You can print hundreds of labels without stopping to reload.
- Weather-Resistant Stock: If you’re shipping items that might get left on a porch in the rain, investing in durable, water-resistant thermal labels is a smart move. It can prevent barcodes from smudging and becoming unscannable while they’re out for delivery.
Creating a Reliable Label Printing Workflow
Alright, you’ve picked your printer. Now, let’s move from hardware to habit. The real secret to stress-free shipping is building a consistent, repeatable process for printing your labels. A solid workflow gets rid of the guesswork, slashes errors, and saves a surprising amount of time—especially when orders start piling up.
The goal is to make printing a label as automatic as grabbing a packing box.
I’ll walk you through a practical example using a platform like Aeros Couriers, which is built for Australian businesses. Don’t worry if you use a different system; the core principles are exactly the same. It all comes down to establishing a set of steps you follow every single time, ensuring every label is perfect from the get-go.
Preparing Your Shipment in the System
Before you can print anything, you have to create the label itself. This all starts inside your shipping platform. With a system like Aeros Couriers, the first step is always entering the package details: where it’s going, what it weighs, and its dimensions. Getting this right is crucial, as this info directly impacts the shipping cost and what gets encoded into that all-important barcode.
Once the details are locked in, you’ll choose a courier service. The platform will usually show you a few options based on price and delivery speed, so you can pick the best fit for that order. This is the moment the system generates the unique consignment and tracking numbers that will live on your label.
This infographic breaks down how to think about your printing setup.

As you can see, your shipping volume really steers your printer choice, which then dictates the kind of label stock you’ll need to keep things running smoothly.
Generating and Configuring the Label PDF
After you’ve confirmed the booking, the platform will generate the shipping label as a PDF, ready to print. This is where a lot of people get tripped up. Just hitting ‘Print’ without a second glance is a recipe for wasted labels and a whole lot of frustration.
There are two settings you absolutely must check:
- Page Size: This has to match the label stock you’re using. If you have a thermal printer, you’re looking for 100x150mm or 4×6 inches. For a standard laser printer with A4 sheets, you’ll choose A4.
- Orientation: Make sure the label is set to print the right way up. For single thermal labels, it’s almost always Portrait.
Mismatched settings are the number one reason labels print tiny, off-centre, or across multiple stickers. Seriously, taking five seconds to double-check these settings in your printer dialogue box (on both Windows and macOS) will save you a world of pain. For anyone interested in the nitty-gritty of label production, this guide on making custom stickers from scratch offers great insights into design and production workflows.
Pro Tip: Save your settings as a custom preset in your printer dialogue. Call it something obvious like “Shipping Label.” Next time, you can just select it in one click and know everything is configured perfectly.
Mastering Batch Printing for Efficiency
Printing labels one by one is fine when you’re just starting out, but it becomes a major bottleneck pretty quickly. Once you’re scaling, batch printing is a total game-changer. Most shipping platforms, including Aeros Couriers, let you select a whole bunch of orders at once and generate a single PDF containing all the labels.
This one change speeds up your fulfilment process dramatically. Instead of opening and printing dozens of individual files, you send one job to your thermal printer, and it spits out the labels one after the other. It’s a simple shift in workflow that can genuinely free up hours during your busiest times. And before you finalise everything, it’s always smart to calculate shipping charges to make sure you’re getting the best rates for your batch.
By creating a structured workflow—from entering data and selecting a courier to verifying print settings and using batch functions—you build a system you can rely on. It’s a process that minimises mistakes, saves money on supplies, and ultimately helps you get parcels out the door and to your customers with professional precision.
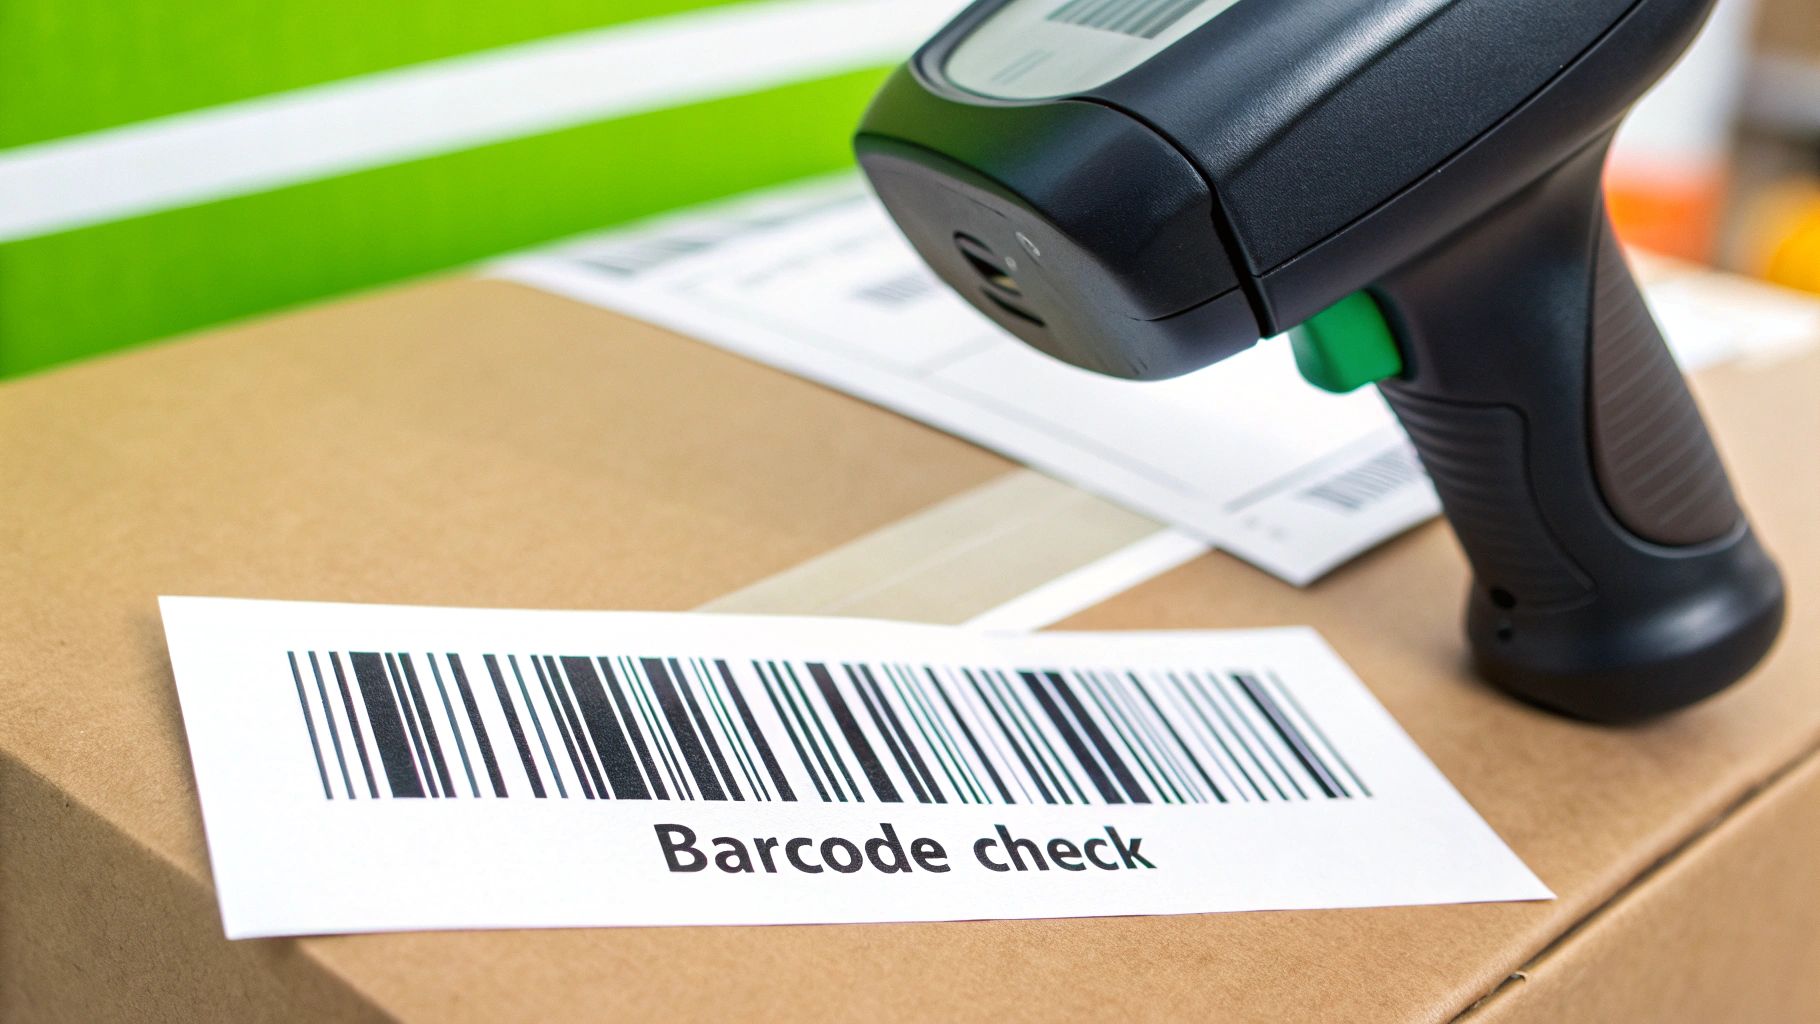
Making Sure Your Barcodes Scan, Every Single Time
A perfect shipping label is the key to a smooth delivery, but it’s the barcode that truly does all the work. If that simple pattern of black and white lines can’t be read by a scanner, your parcel effectively becomes invisible to the courier network.
Getting this right isn’t just a ‘nice to have’—it’s a critical part of professional shipping. Even a tiny smudge or a slightly faded print can grind an automated sorting machine to a halt. This often means manual intervention, which leads to delays and, you guessed it, potential surcharges from your courier.
Print Quality and DPI Settings
The clarity of your barcode all comes down to your printer’s resolution, measured in Dots Per Inch (DPI). A higher DPI simply means a sharper, more detailed print that scanners can pick up without a hitch.
- Standard Resolution: Most thermal printers you’ll find start at 203 DPI. This is usually perfectly fine for standard Australian shipping labels, as long as you keep the print head clean and your settings dialled in.
- Higher Resolution: If your labels have a lot of small text or you’re just not happy with the quality, moving up to a 300 DPI printer makes a real difference. It pretty much guarantees a crisp scan and reduces the chance of errors.
No matter what printer you use, always choose the highest quality setting available. This ensures the lines of the barcode are solid and distinct, without any of the fuzziness that can trip up a scanner.
Why High-Quality Label Stock is a Must
The paper you print on is just as important as the printer itself. I’ve seen it time and time again: cheap, thin label stock is a recipe for disaster. It smudges easily, tears, and can fade during a long trip across the country.
This is especially true for direct thermal labels, which react to heat and light. Imagine a parcel left on a sunny Perth doorstep—a low-quality label can literally fade to grey, making the barcode completely unreadable. Investing in good thermal paper with a protective topcoat is a small price to pay to avoid these massive headaches.
The logistics world knows this well. The global shipping label market is a multi-billion dollar industry, and specialty papers account for about 37.6% of the materials used. Shippers prefer them because they’re built to survive everything from moisture to extreme temperatures. You can read more about how materials are evolving in logistics at Future Market Insights.
Test Your Barcodes Before They Go Out the Door
Here’s a simple pro-tip: before you print a big batch of labels for the day’s shipments, do a quick quality check. You don’t need a fancy commercial scanner for this; your smartphone is all you need.
Just open your phone’s camera and point it at a freshly printed barcode. If the camera recognises it instantly and suggests a web search for the number, you’re golden. That’s a strong sign a courier’s professional scanner will have no trouble at all.
If your phone struggles to read it, you’ve likely got an issue. This two-second test can save you from wasting an entire roll of labels and helps you spot problems like a dirty print head or the wrong quality settings early.
More Than Just a Barcode: Courier Requirements
While the barcode is the hero, Australian couriers have other rules about what needs to be on the label and where. Ignoring these can cause just as many issues as a dodgy print.
Every compliant label needs to clearly show:
- The sender’s and recipient’s full addresses.
- The unique tracking number and its matching barcode.
- The courier’s logo and the service type (e.g., Express, Standard).
- Any special handling instructions, like ‘Fragile’ or ‘This Way Up’. These should be prominent but never cover up the essential shipping info.
Sticking to these layout standards is non-negotiable. It ensures every person and machine involved can find what they need instantly, helping you deliver a genuinely fast courier experience. By nailing these details—print quality, great label stock, and smart testing—you set every parcel up for a smooth, successful journey from your door to your customer’s.
Of course. Here is the rewritten section, designed to sound natural and human-written, as if from an experienced professional.
What to Do When Your Printer Misbehaves
Even the best-laid plans can hit a snag, and when it comes to printing shipping labels, a small glitch can throw a real spanner in the works. But there’s no need to panic when a label comes out looking wrong. Instead of letting frustration take over, it’s far better to have a quick mental checklist ready to go.
This is your first line of defence against the most common printing headaches we see Australian businesses run into.
https://www.youtube.com/embed/OQmVLHgp56o
Think of this as your go-to guide for figuring out what’s wrong and fixing it fast. Most of these problems have surprisingly simple solutions, and knowing where to look first will get you back to packing and shipping without missing a beat.
Solving Off-Centre or Misaligned Labels
This is probably the number one issue people face: a label prints off-centre, cutting off a crucial barcode or part of the address. Nine times out of ten, this is purely a settings mismatch between your computer and your printer.
Before you start pulling your hair out, check these three things:
- Paper Size Mismatch: Your printer driver must be set to the exact size of your labels. For nearly all Australian couriers, that’s 100mm x 150mm. If your computer thinks it’s printing to an A4 sheet, the alignment will be completely out of whack.
- Wrong Orientation: Make sure the orientation is set to Portrait. A landscape setting will try to print everything sideways, which never ends well.
- Scaling Issues: Hunt for any setting like ‘Scale to Fit’ or ‘Fit to Page’ and make sure it’s switched off. The label PDFs from Aeros are already perfectly sized, and letting your system “help” by scaling them will only shrink or stretch the output, pushing it off-centre.
Often, a quick calibration will sort these alignment woes instantly. Most thermal printers can automatically detect the label size and the gap between each one. Just turn the printer off, hold down the feed button, and switch it back on—this usually kicks off the calibration process.
Why Is My Printer Skipping Labels?
Here’s another classic frustration: your thermal printer spits out one perfect label, followed by one or two completely blank ones. It’s a waste of good labels and can seriously mess up your batch printing rhythm.
This skipping problem is almost always a calibration issue. The printer’s sensor has simply lost track of where one label ends and the next one begins.
Recalibrating your printer is the quickest fix. It’s a simple reset that helps the machine re-learn the exact dimensions of your labels, including that tiny gap in between. Check your printer’s manual for the specific button-press sequence.
If a recalibration doesn’t do the trick, take a moment to double-check that the label roll is loaded correctly and sitting firmly in its housing. If the roll is a bit loose or not aligned properly, the sensor can misread the gaps and cause the skipping.
Dealing With Faded or Blurry Barcodes
A barcode that’s blurry, faint, or has white lines running through it is a huge red flag. It’s a guaranteed scanning failure just waiting to happen at the depot, which means delays for your customer. This problem points directly to the print quality itself.
Here’s a quick checklist to run through:
- Clean the Print Head: Over time, tiny bits of dust and adhesive residue can build up on the thermal print head, causing those annoying streaks and gaps. A gentle wipe with an isopropyl alcohol cleaning pen or a lint-free cloth will clear it up. Honestly, doing this regularly saves a lot of trouble down the line.
- Adjust Speed and Darkness: Dive into your printer settings and try slowing down the print speed. At the same time, bump up the darkness or heat setting. Printing too fast can sometimes produce a lighter, less defined barcode, while a higher darkness setting ensures it comes out crisp and solid black.
- Check Your Label Quality: Don’t underestimate the impact of your supplies. Low-quality or old thermal paper can be the culprit. If your labels have been sitting in a hot or sunny spot, the heat-sensitive coating might have degraded, leading to a poor-quality print.
To make things even easier, here’s a quick-reference table for when you’re in a hurry.
Common Shipping Label Print Issues and Solutions
| Problem | Potential Cause | Solution |
|---|---|---|
| Labels are misaligned or off-centre | Paper size is set to A4 instead of 100x150mm. “Scale to Fit” is turned on. | Correct the paper size in your printer driver settings. Disable all scaling options. |
| Printer is skipping blank labels | The printer’s sensor is not calibrated to your label stock. | Run the printer’s automatic calibration cycle (usually by holding the feed button on startup). |
| Barcodes are faded, blurry, or have lines | Dirty print head. Print speed is too high or darkness is too low. | Clean the print head with an alcohol wipe. Decrease print speed and increase the darkness setting. |
| Nothing prints at all | The wrong printer is selected in the print dialogue. The USB cable is loose or faulty. | Double-check that you’ve selected your label printer. Reseat the USB cable at both ends. |
By working through these common issues systematically, you can solve most printing problems in just a few minutes. Keeping your printer clean and your settings consistent is the real secret to reliable and professional shipping labels printing.
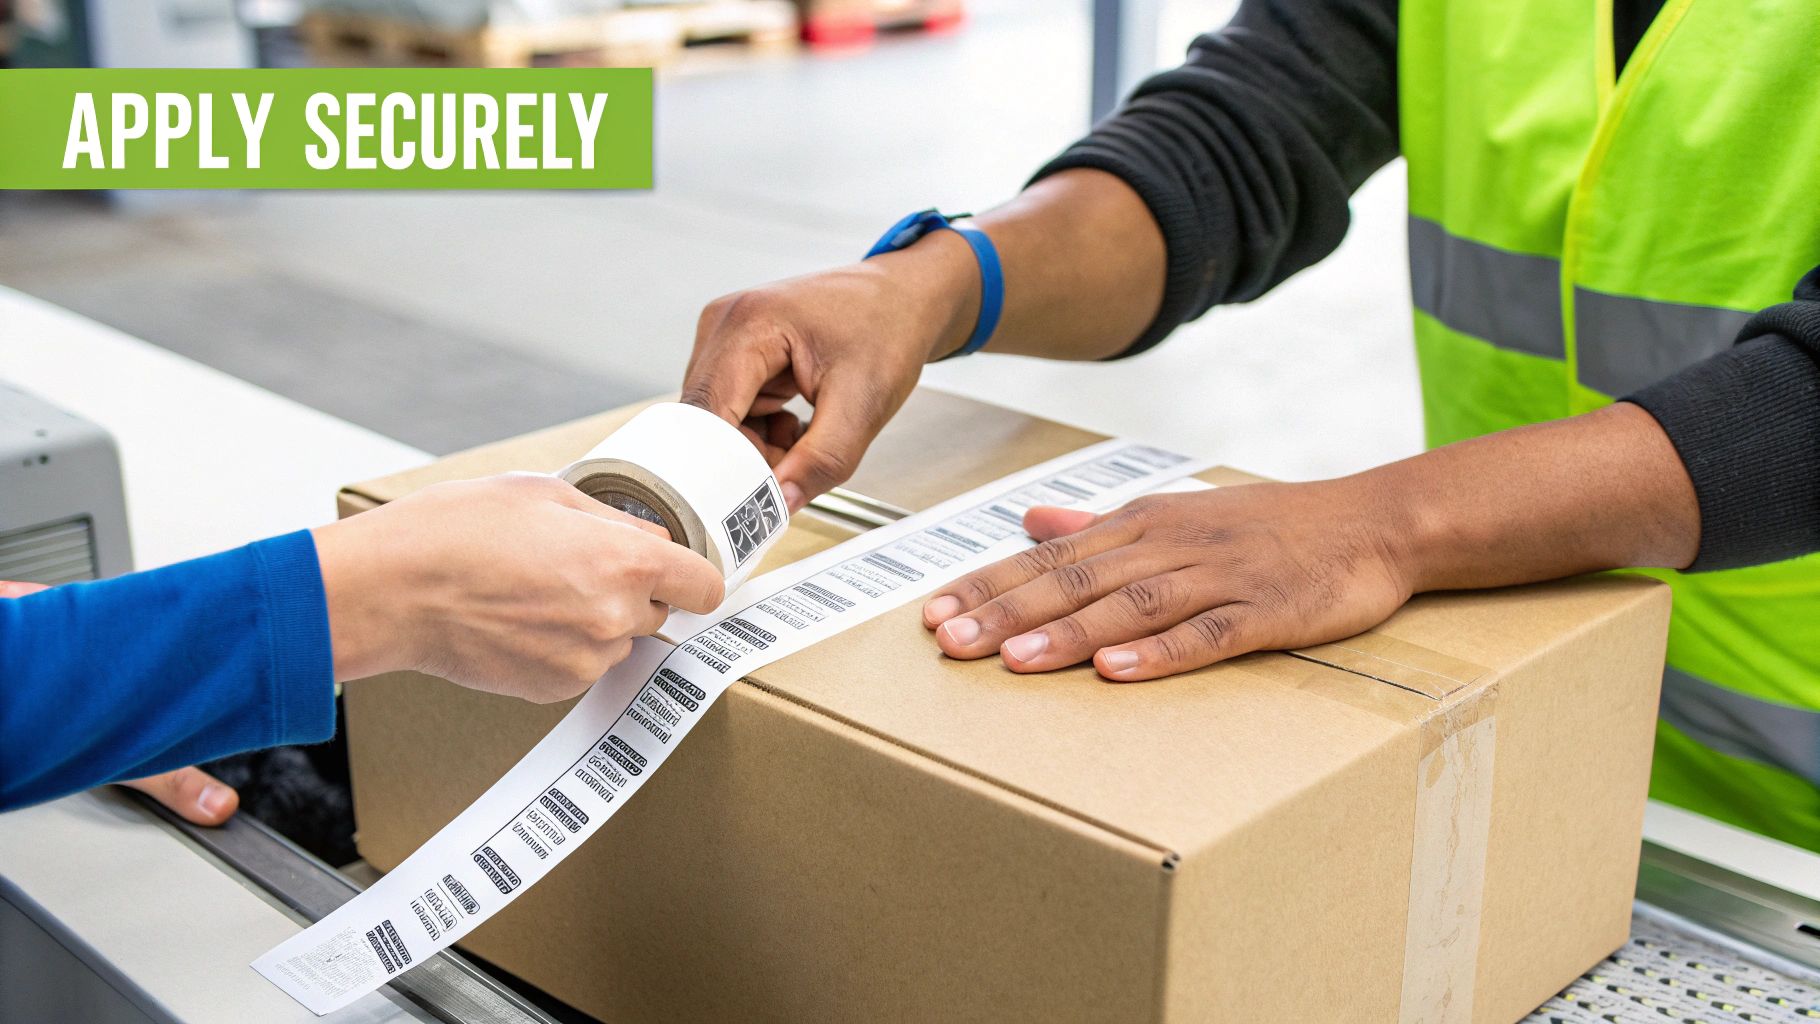
Applying Labels for a Successful Delivery
You’ve gone to all the trouble of getting your printing process just right, but the final, seemingly simple step—actually sticking the label on the parcel—is where things can still go wrong. A perfectly printed label won’t do you any good if it peels off, gets creased, or becomes unreadable on its journey across Australia.
Getting this last part right is what ensures your package glides smoothly through the courier network without a hitch.
The golden rule here is to never place tape over a barcode. I know it feels like you’re protecting it, but the glare from shiny tape can wreak havoc on scanners, causing them to fail. This one small mistake can lead to manual handling, sorting errors at the depot, and frustrating delays. If you’re using paper labels, just tape around the edges, leaving the barcode and address completely exposed.
Best Practices for Label Placement
Think of the label as the package’s passport; it needs to be visible and secure for both sorting machines and courier drivers.
- Stick to Flat Surfaces: Always place the label on the largest, flattest side of the box. This is the best way to avoid wrinkles that might obscure the barcode or vital delivery info.
- Keep Clear of Seams and Edges: Never, ever wrap a label around a corner or over a box seam. This can split the barcode right down the middle, making it completely unscannable.
- Press It Down Firmly: Make sure the entire label, especially the corners, is pressed down securely to create a solid bond. Self-adhesive labels are great, but they need good, even pressure to do their job properly.
A classic mistake I see is with odd-shaped items like mailing tubes or soft satchels. For a tube, always apply the label lengthwise along the cylinder, not around it. For a satchel, lay it flat on a table before sticking the label on to prevent any creases.
Packaging for Australian Conditions
Your choice of packaging has a huge impact on how well your label sticks and survives the trip. Australia is a massive country, and parcels often have a rough ride. Using high-quality, durable mailers or sturdy cardboard boxes is non-negotiable for protecting both your products and the label itself.
For businesses wanting to nail their entire shipping workflow, from booking to dispatch, it’s worth understanding the full process of how to send a parcel according to courier standards. The right packaging provides a reliable surface for your label, setting you up for a successful delivery every single time.
Got Questions? We’ve Got Answers
Once you’ve got the basics sorted, a few more specific questions almost always pop up. Here are some of the most common ones we hear from Australian businesses trying to perfect their shipping label process.
Do I Really Need a Special Printer Right Away?
Honestly, no. When you’re just starting out, printing your labels on A4 paper with your regular office laser or inkjet printer is perfectly fine. It’s a cost-effective way to get your first orders out the door without a big upfront investment.
But keep an eye on the clock. As your daily orders grow, you’ll notice the time spent cutting A4 sheets and taping them to boxes really starts to add up. Once you’re sending more than a few parcels a day, upgrading to a dedicated thermal printer is a no-brainer. It will pay for itself in saved time and supplies pretty quickly.
Can I Just Buy Any Old Labels?
You’d think all thermal labels are created equal, but the quality can be all over the place. Cheaper labels often come with weaker adhesive that can peel off mid-journey. Even worse, the paper itself might be prone to fading in the heat or sunlight—a serious problem for a package left on a sunny Australian doorstep.
To avoid any drama, stick with high-quality labels from a supplier you trust. Make sure you’re using the standard 100mm x 150mm size. This is the format that all the major Australian couriers, from Australia Post to StarTrack, have calibrated their sorting machines for. Using the right size and quality significantly cuts down the risk of scanning errors that cause delays.
Think of it this way: your shipping label is a core part of your delivery promise. Saving a few cents on cheap labels just isn’t worth the stress of a lost or delayed parcel.
What’s the Best File Format for Printing Labels?
When it comes to printing, PDF (Portable Document Format) is king. There’s a reason platforms like Aeros generate labels as PDFs—they lock in the layout, fonts, and most importantly, the barcode quality. It doesn’t matter if you open it on a Mac, a PC, or a tablet; it will look exactly the same.
That consistency is crucial. It ensures what you see on your screen is precisely what prints, eliminating weird scaling issues or distorted barcodes that refuse to scan. For foolproof results every time, always print directly from the PDF file provided by your courier platform.
Ready to make your entire shipping process simpler? Aeros Couriers gives you one platform to get instant quotes, book couriers, and manage all your label printing from a single dashboard. Book a courier online and discover just how easy Australian shipping can be.
